Bruker NPFLEX 3D Optical Microscope
Bruker NPFLEX 3D Optical Microscope
Most flexible large-sample precision manufacturing solution

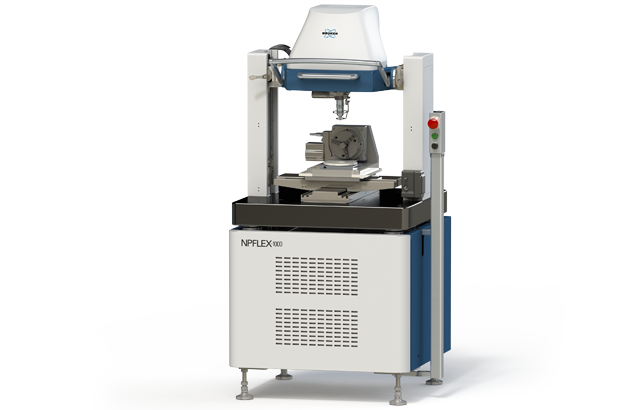
The NPFLEX-1000 floor-standing white light interferometer (WLI) offers the most accurate and flexible solution for evaluating nano- to macro-features on large parts in precision machining QA/QC. Key features include a large form-factor open-gantry, robust bridge architecture, and swivel head design with 300 mm of distance between stage and objectives. This exclusive design allows NPFLEX-1000 to accomodate the widest variety of sample sizes and shapes and access the most challenging orientations.
With this unique design, combined with the ease-of-use advantages of our next-generation optical profiler technology, NPFLEX-1000 delivers gage-capable surface texture and roughness measurements with the throughput and repeatability operators need in dynamic sectors such as automotive, medical, and large-scale additive manufacturing.
Features:
-
Ultimate large-part and high-slope surface compatibility reduces sample preparation and increases the range of measurement surfaces accessible per part
-
Exceptional ease-of-use empowers operators at any experience level to obtain expert results
-
Super-fast automated measurement and analysis routines provide decreased time-to-result
-
Highly robust bridge architecture and integrated vibration isolation offer long-term accuracy and reliability for production environments.
For further information please contact us or download the datasheet.
Precision Surface Characterisation Yields Quantitative Analysis of Cutting Tool Coatings and Wear
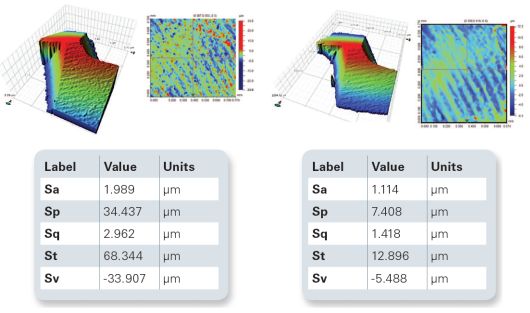
The ability to quantitatively analyse surface coating structure and wear is an important qualification within the precision tooling industry to assess cutting tool life under different cutting conditions. This however can be a challenging prospect for CMM's due to the lack of 3D measurement resolution, and for stylus based tools due to the complex shape and often smaller feature size of the tools. In a recent development by Bruker Surface Analysis group the NP Flex was applied to the study of drill bit coatings under controlled conditions to assess the subtle changes of different coatings.
The study utilised the nanometre vertical measurement sensitivity of the 3D interferometric technique employed on the NP-FLEX to assess surface wear after only a few drilling processes. Qualifying surfaces to new ISO2012 standards for 3D surface parameters, such as Sa and Str, provide a statistical approach to understanding wear and removes any subjective assessment which can lead to incorrect conclusions. The case study investigated the pre and post wear surfaces at the apex of the drill bits in QC environment as well as along leading edge cutting regions to quantitatively assess coating wear. From this study an understanding of the coating of choice was determined.
